

Hey guys! Every summer for the past couple of years, I’m sure you’ve seen the pressed flower phone cases literally everywhere. And it makes 100% complete sense! They’re adorable, inexpensive and supposedly easy…right? The problem is, I haven’t been able to find one good tutorial on how to do them. So, I decided to make an easy tutorial that doesn’t require you to glue flowers to a phone case (or your phone XD) and all you need is a clear phone case and some pretty flowers!
First and foremost, go get a clear phone case, you can get a super inexpensive one or use a more expensive one. Here is the one I’m using, but if you have a different phone there are quite a few clear cases on Amazon for under $5. Also, just a heads up, after a while of use, clear phone cases have a tendency to get a little dirty, so if you already have one and it’s a little dingy, don’t be afraid to take a magic eraser to it to clean it up.
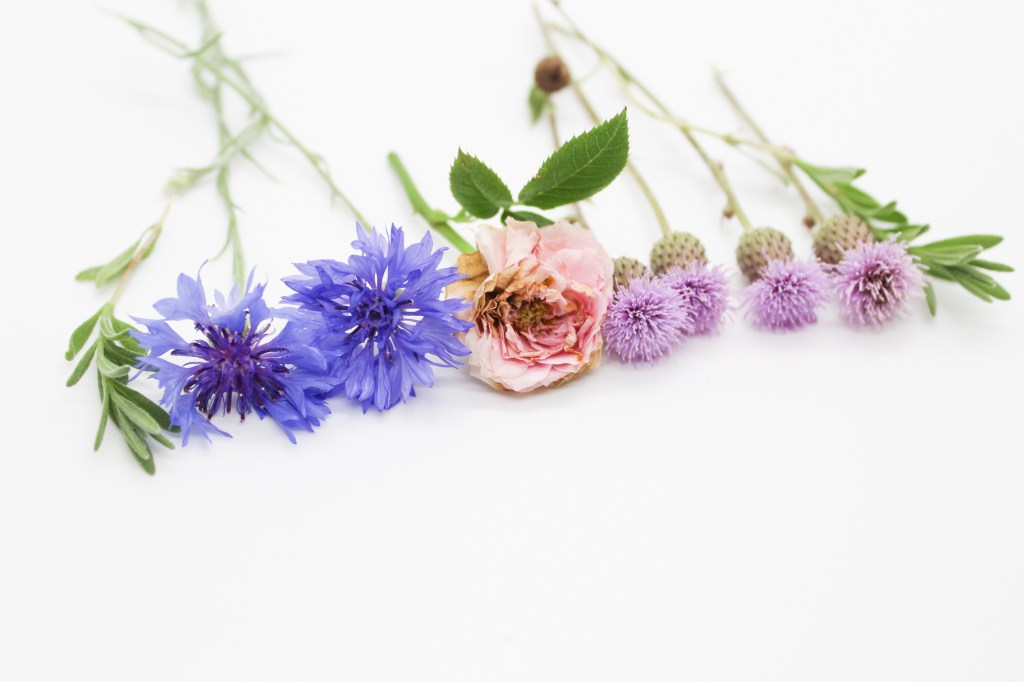
Next, you’ll need to gather your flowers! I like to stick to at least a little bit of a color scheme, but if you’d prefer not to, that’s totally fine! 😉
You can press flowers in a book and wait for several weeks for them to be pressed, or you can do in a few minutes with your microwave. I personally prefer the microwave option, so I’ll show you how to do that today, but there are many other options for pressing flowers, so don’t be afraid to do some research on the topic.
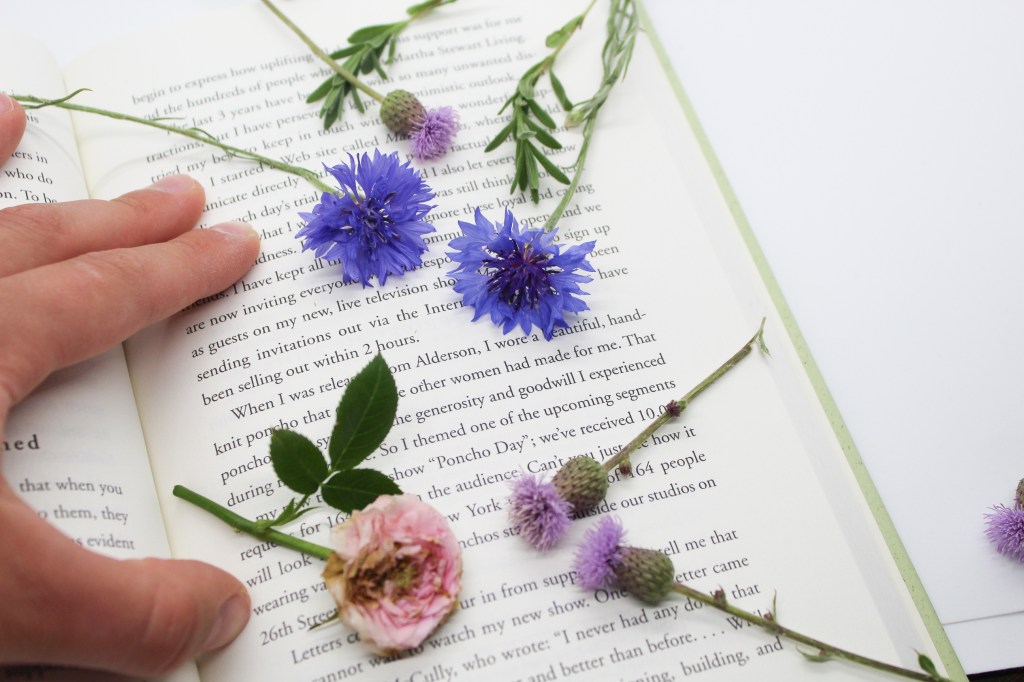
Begin by placing all your flowers in an old book and leave them overnight.
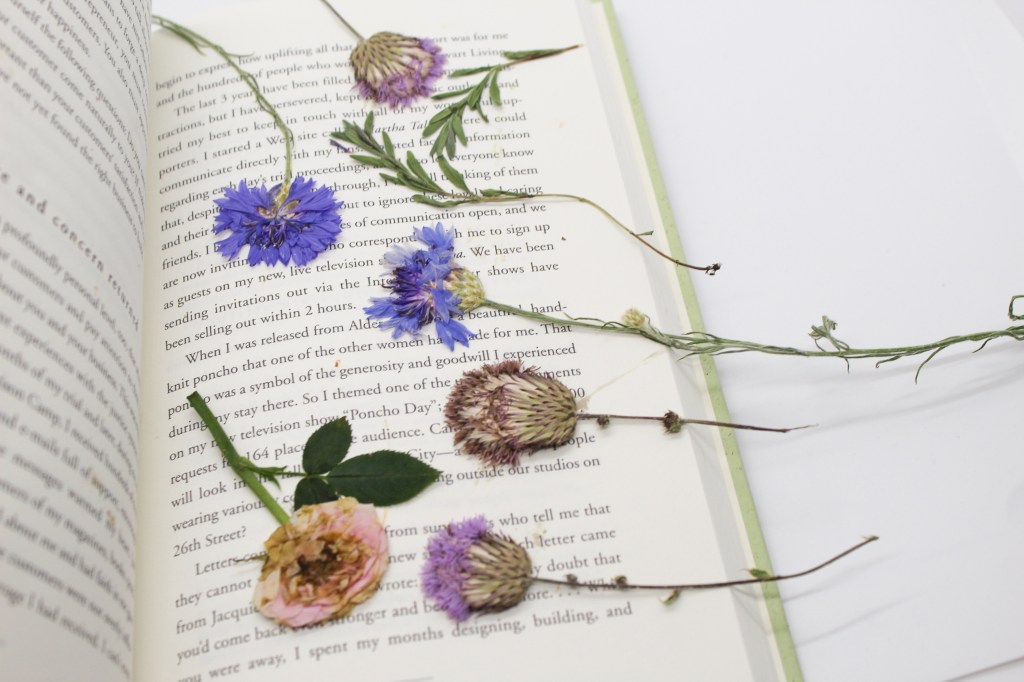
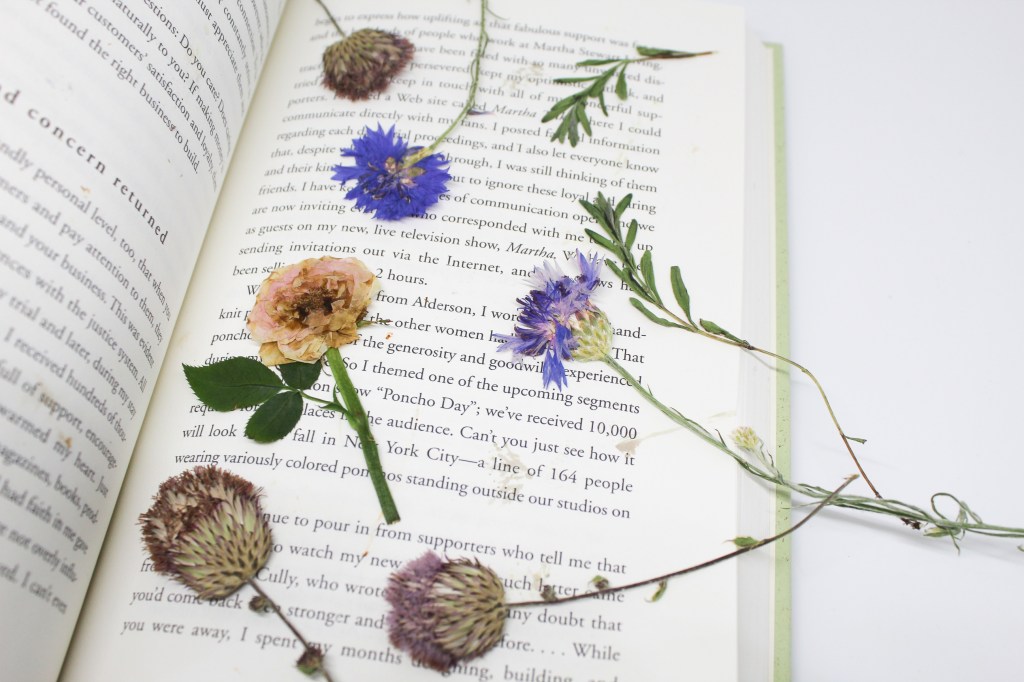
The next morning, the flowers should be pretty flat, but not dried out yet. To dry them out, place the book in a microwave and zap for 30 seconds. Let them cool for a couple minutes and you’ll have pressed flowers! They pretty much retain their colors like they would if you waited weeks for them to dry.
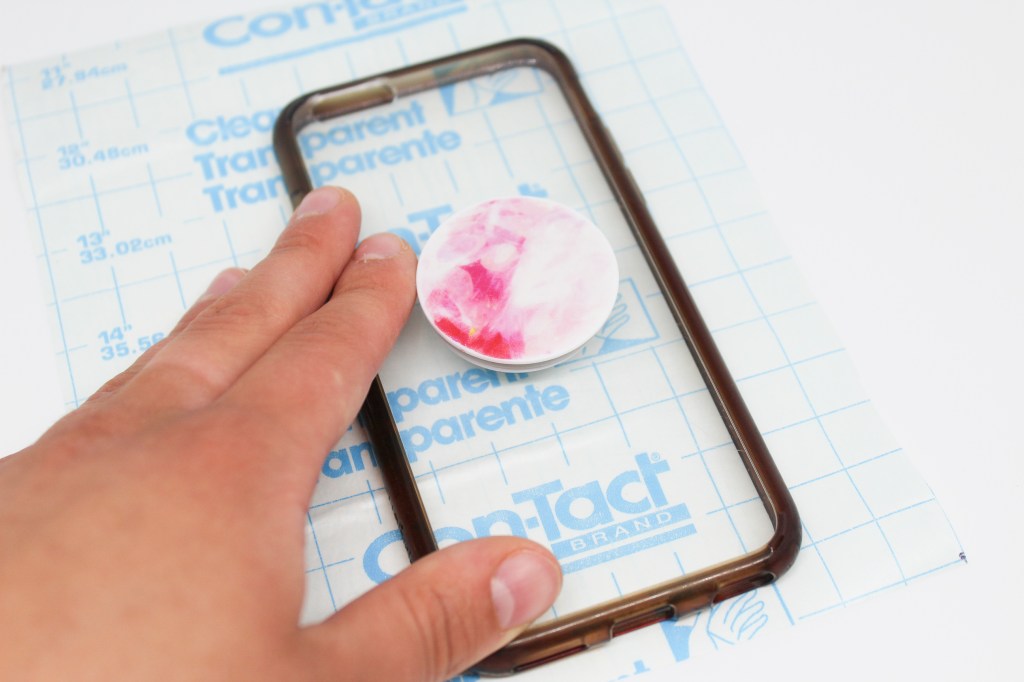
Now for getting the flowers into the phone case. Begin by taking some contact paper and simply tracing around the phone case. I just kept trimming mine until it fit snugly into the case. Don’t forget to cut a hole for your camera!
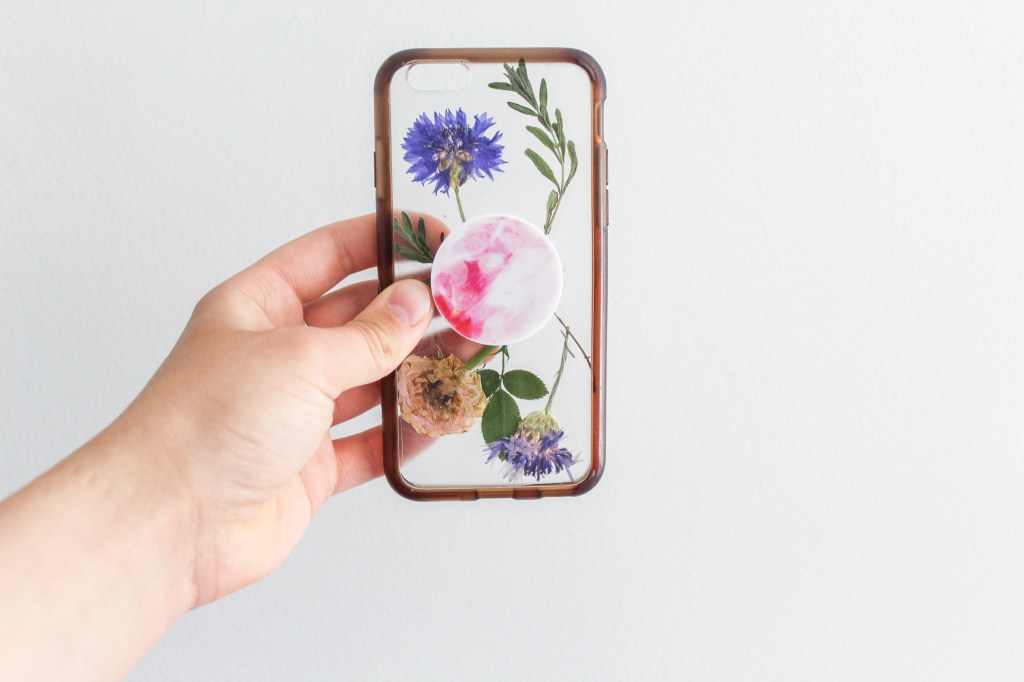
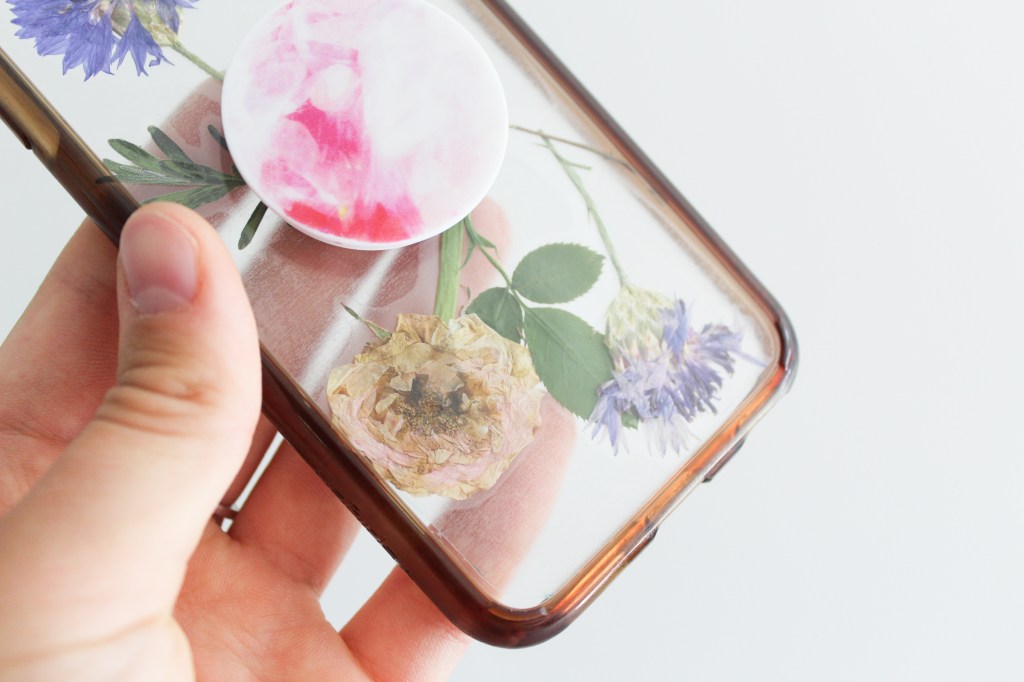
Your flowers should be pretty cool by now, so arrange them as you like in your phone case. You can just add a couple of flowers, or you can fill your case! Also, make sure none of the flowers are overlapping on the sides. You don’t want them to interfere with the buttons on the side of your phone.
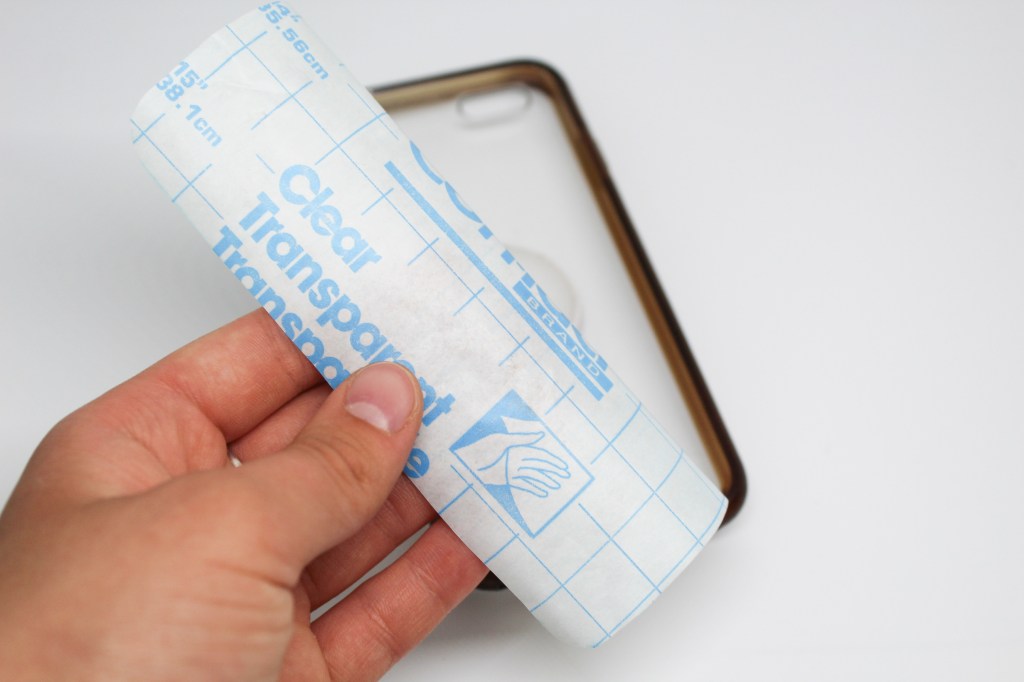
Next, simply press the contact paper into place. Make sure to press it down pretty well.
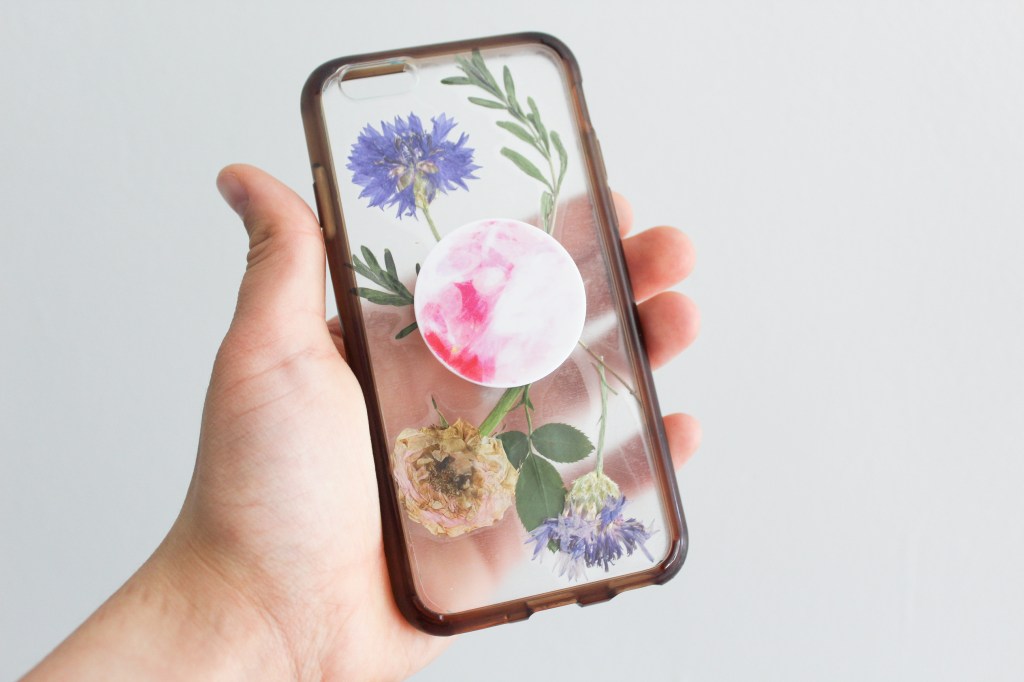
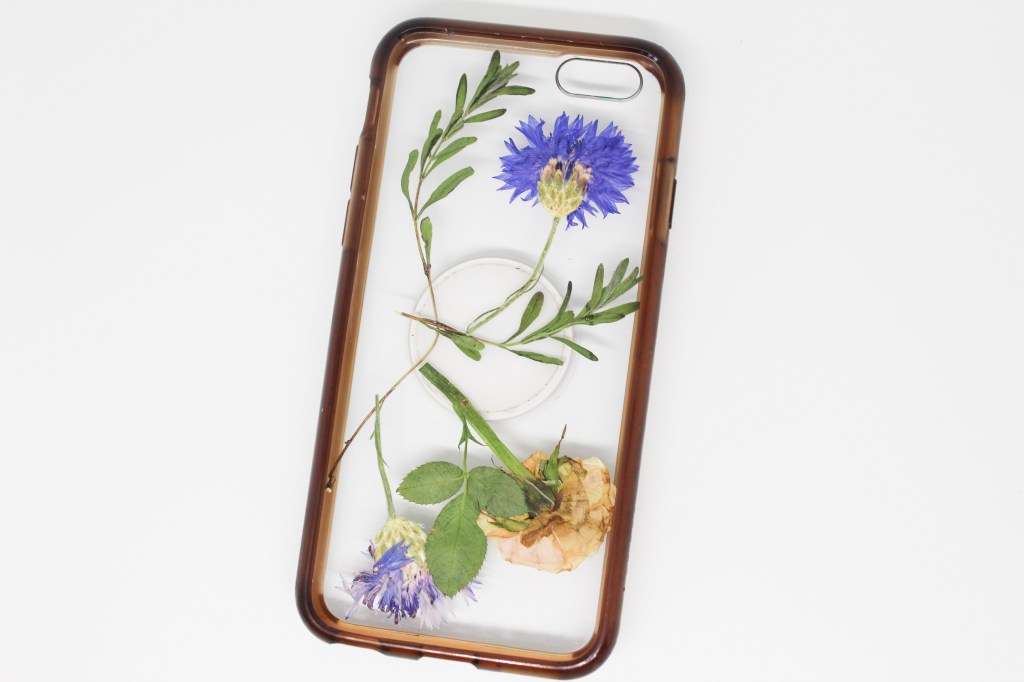
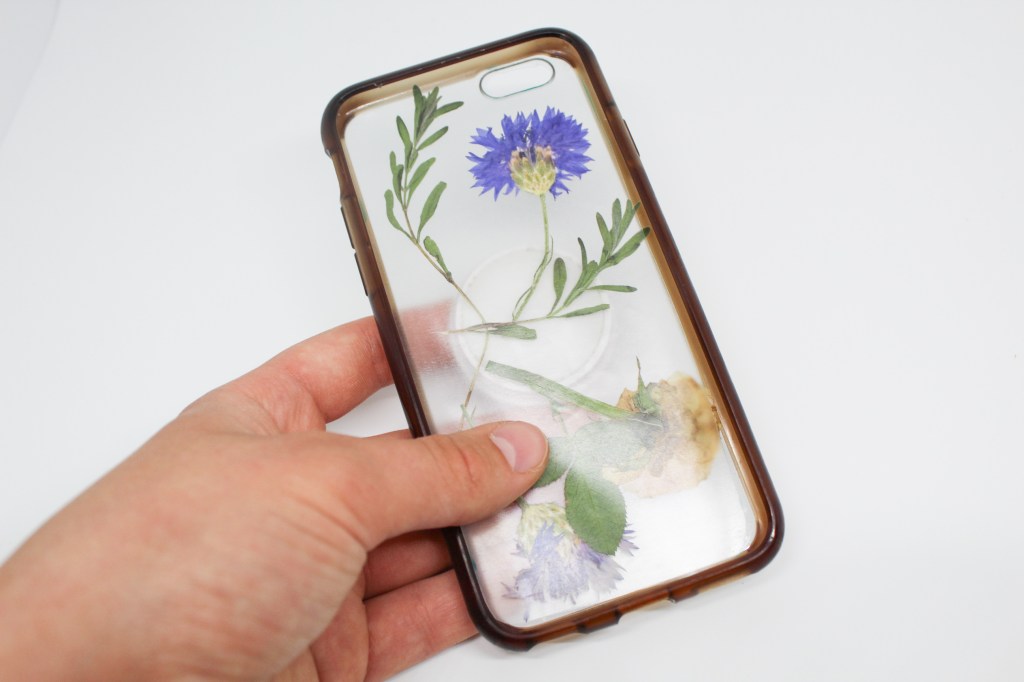
And there you have it! A super easy pressed flower phone case, no glue required! If you ever want to change the design/remove the flowers, just peel back the contact paper. Super easy!
I hope you guys enjoyed this little tutorial! It’s seriously so easy & inexpensive and it only took me about 15 minutes to assemble! 😁
Also, make sure to pin this one to Pinterest!
❤ Hannah

Ahh, this is gorgeous! I really want to make something like this but my phone isn’t a standard iPhone or other popular kind so it’s hard to find cases that fit. Maybe I can find a clear one sometime and try this out! I love the tip of finishing the drying part in the microwave! Your case turned out so, so lovely. ❤
LikeLiked by 3 people
Aww, thanks, Allison! Hmm, that stinks, but I hope you’ll be able to find one. You could try looking under whatever brand your phone is on Amazon since they have soooo many different cases! I hope you can find one! 🙂
LikeLike
That’s a good idea. And thanks!
LikeLike
You can also use mod lodge to seal so it lasts longer
LikeLiked by 1 person
Wow this beautiful Hannah!
LikeLiked by 1 person
Aww, thanks Magaidh!
LikeLiked by 1 person
❤
LikeLike
This is a cool idea!!
LikeLiked by 2 people
Thanks! You should try it! 👍
LikeLiked by 1 person
Omg these are so gorgeous!! Also just wanting to know as I know your blog doesn’t have an Instagram, do you find it harder to grow and find new blogs? Xx
LikeLike
That’s SOOO pretty!! 💕💕
~Esther
LikeLiked by 1 person
Thank youuu! ❤
LikeLiked by 1 person
soooo pretty!! i have wanted to do a pressed flower case for a while now, so i may do it this summer now!! thanks, Hannah!
-Alivia
LikeLiked by 1 person
Ooh, you totally should! I’d love to see if you do! 🙂
LikeLike
WOW those flowers are so beautiful I thought they were stickers! And it’s so cool that you can microwave them like that. Awesome tutorial!
LikeLiked by 1 person
Aww, thanks! I know, I thought so too! 😉
LikeLiked by 1 person
This is gorgeous! Amazing post!
LikeLiked by 1 person
Thank you so much!
LikeLiked by 1 person
Ahhh so beautiful and creative! Wowie, my iPhone case is getting old and dirty at this point so, I may give this a go 😂❤️Thanks for the inspiration:)
LikeLiked by 1 person
Ooh, you totally should! 👍😁
LikeLiked by 1 person
So pretty!!! Does anyone know if they make clear protective phone cases? With my job and my clumsiness, I can’t go without that protective case. 🙂
LikeLiked by 1 person
I’m sure they do, I’d check on Amazon! I think that they are a little more expensive, but it’s definitely worth it! 👍😉
LikeLiked by 1 person
Nice!! I don’t have a phone (XD at least not yet…), but this is still very pretty!
-Haley
LikeLike
It turned out so pretty! I didn’t know the microwaving the flowers trick. It is really cool! 🙂
– Pixie
LikeLike
Wow! Great post
LikeLike
Awe this is SO cute!!! I’m getting a clear phone case, and now i really want to try this!!
❤
LikeLike
That’s really cute! Good job.
LikeLike
Oh my goodness this is such an amazing tutorial! I’m so excited about this. I have a clear phone case already so I can’t wait to try it out!
LikeLike
This is so cute! I want to try it out x
LikeLike
Wow, this is literally so cute!! I LOVE IT!!! The flower design is really pretty too.
*hugs
-kaelyn 😛
LikeLike
Eeek! That is absolutely gorgeous! *heart eyes* I have got to try that! 😀 Wonderful post! 🙂
-Laura ❤ 🙂
LikeLike