

Hey guys! If you’ve been following this blog for any amount of time (or SP Aesthetic, for that matter) you know that I absolutely adore sunsets. In today’s guide I’ll be giving you some of my favorite tips for shooting and editing golden hour / sunset photos.
Disclaimer: Today’s post is not sponsored by Photographer Supply Co, however, they were so kind as to send me a camera strap to review.

Photography Supply Company Review
First of all, Photography Supply Company sent me this gorgeous camera strap to review. It is so much better then my old one which was just the basic one Canon sends you when you buy a camera.

The camera strap is so sturdy, yet it is super comfortable on. Attaching it to your camera is super easy and quick. The fastening system is very high quality, which I was super impressed with.
They have a huge variety of new camera straps just for 2019. My favorites are the Big Dipper, Great Southwest, and Meso Maya camera straps.

The shipping time was super quick, and they sent me this cute little pin, along with a pamphlet of some of their latest products!
Shooting Sunsets – Tips + Tricks
As I mentioned earlier in the post, I love photographing sunsets (and just sunsets in general XD) And over the past few months I’ve really developed some strategies to getting amazing sunset photos.
Know What Time Golden Hour Is
In order to get good sunset / golden hour photos, you need to know what time you’ll want to get outside to start your shoot – don’t forget extra time for setting up your tripod. 😉
Haze = Shoot In Open Light | Backlit = Shoot Standing In Shadow
This one is pretty self-explanatory, but still super important. To get that super hazy, glowy light you need to stand in direct sunlight, but if you want more of a direct, backlit photo, then try standing in a shadow, or looking into the sun.
White Balance On “Cloudy” For That Warm Glow
Setting your camera’s white balance to cloudy really makes a difference for that warm, creamy golden hour glow.
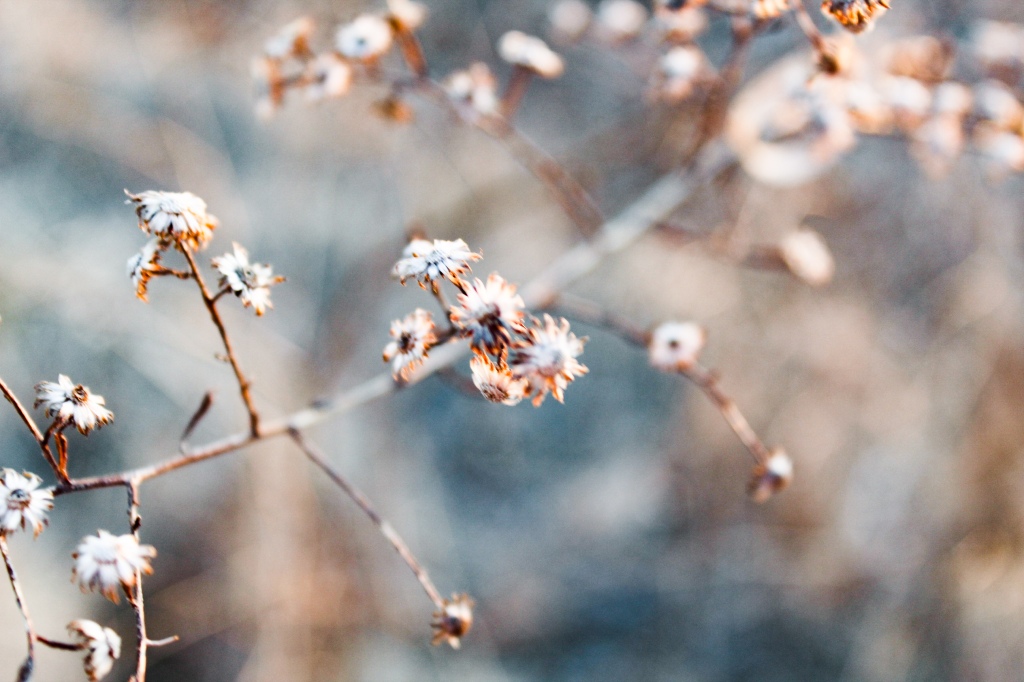
Find Strong Focal Points
Instead of just shooting the sunset, look for smaller details such as shrubs / flowers, rocks, or if you are near water, beach details.
Use A Tripod
In order to get a steady landscape photo, you really do need a tripod. I use my tripod for all sunset landscape photos, however I typically don’t use it on the up-closes.
Editing Sunset Photos – Tips + Tricks
I touched on this briefly in my photo editing tutorial, but I thought I’d go into more detail specifically on editing golden hour photos.
Before I begin editing I like to decide on a theme for the photos. I could take them in a more warm direction, cool direction, or more of a hazed direction. I’ve included the editing I did on the corresponding photos below:
Note: I did use a few Lightroom Presets on these, but most of them I manually edited, so you can do them in any program with similar features.
Hazed

Golden Glow

Warm

Cool
Creative

Natural

Guyssss, the first podcast episode is coming out this weekend. This podcast is exclusively for the email list ONLY. If you aren’t already subscribed, you can do so now, by clicking here.
Have a wonderful week guys!
💙 Hannah
the striped plaid

Ah, I love Golden Hour(: Beautiful pictures!
LikeLiked by 1 person
Thank you so much!
LikeLiked by 1 person
You’re welcome!
LikeLiked by 1 person
Love the images you share, there amazing. 🙂
LikeLiked by 1 person
Thank you! 🙂
LikeLiked by 1 person
❤
LikeLiked by 1 person
Man, these pictures are beautiful. And I subscribed to your email list!
LikeLiked by 1 person
Aww, thank you Madi! 🙂
LikeLiked by 1 person
What beautiful pictures! Using a tripod is a great idea😉
LikeLiked by 1 person
Thank you Lucy! 🙂
LikeLiked by 1 person
Beautiful beautiful pictures Hannah! ❤ That camera strap is beautiful! I loved this post! 😀
-Laura ❤ 😉
LikeLiked by 1 person
Thank you Laura – I’m so glad you enjoyed!
LikeLiked by 1 person
I love these!! Photography is so amazing. I bought some presets from Elle Storset and WOW they make my photos POP.
Amanda Brown
http://www.ohebelovedone.com
LikeLiked by 1 person
Thank you so much!
LikeLike
I’ve caught some awesome golden hours! I didn’t know there was a term for it..
LikeLiked by 1 person
Haha yeah! 🙂
LikeLiked by 1 person