
Hello everyone! Today I am going to show you how to make these super cute pumpkins! I just love how they turned out! 

Note: The brand/type of clay that I am using I called Sculpey 3, found at Hobby Lobby or on Amazon
You will need orange clay, green clay, and tan clay to make the pumpkins. (you can also experiment to find your perfect orange by adding white or tan clay to the orange before shaping)
Using your orange clay, make a ball (mine is about 3/4 inch)

Flatten one side of the clay with a pressing tool.

Take a dowel rod ( 1/4 inch) and stick it into the center of the clay to make a slight indent.

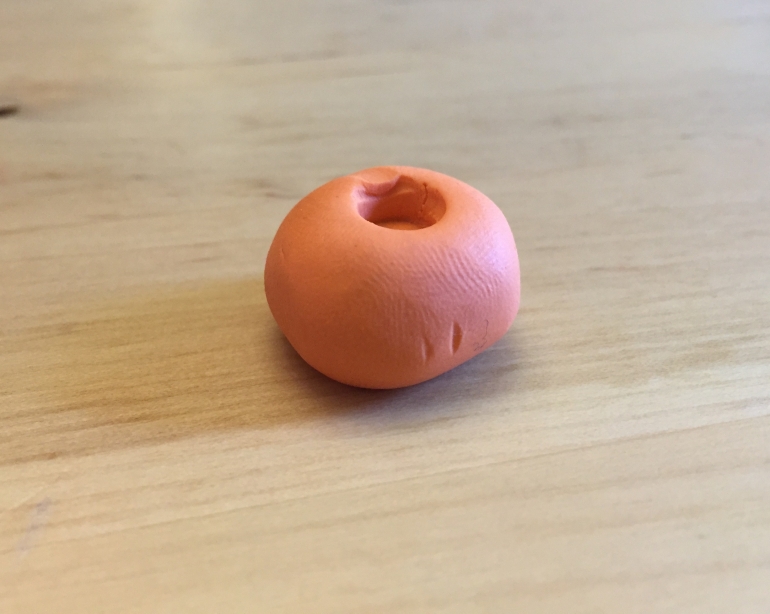
Now, using a toothpick gently drag lines along the sides of the pumpkin

Now take some green clay and some tan clay and mix it!


As you can see (above) I shaped it into a little stem for the pumpkin.
Gently insert the stem into the pumpkin.
Bake as the clay package directs!
Here is the finished project:
(I glazed my finished project to make it stronger and look more professional)


I hope you enjoyed!

P.S. What do you think of my new profile picture? Do you like it?

I love this DIY!!! I do like your new profile pic!
~Kaylyn
LikeLiked by 2 people
Thank you! I have come to love making things with polymer clay!
LikeLiked by 1 person
You’re welcome! ME TOO!!!
~Kaylyn
LikeLiked by 1 person
🙂 Do you think that you will try making the pumpkins?
LikeLiked by 1 person
Hmmmmm…………
Maybe. I am not sure but I will try!
~Kaylyn
LikeLiked by 1 person
So cute! I love tiny things.
LikeLiked by 2 people
Thanks, me too!
LikeLike
Very awesome!!!
LikeLiked by 1 person
Thank you so much 😊
LikeLiked by 1 person
Cute idea!
LikeLiked by 1 person
Thanks! 🙂
LikeLiked by 1 person
This is adorable 😊 ……….. I LOVE tiny things (like my cat, although he more fat than small)………… 😉
LikeLiked by 1 person
Haha!
LikeLiked by 1 person
Aww, so cute! I ❤ pumpkins! 😀 And I love your new profile pic! 😀
LikeLiked by 1 person
Aww, thank you!
LikeLike
SO. SUPER. CUTE!!
LikeLiked by 1 person
Thanks 🙂
LikeLiked by 1 person